Miter Saw Angles For Crown Molding. With this cutting technique, you use a simple jig and the built. place molding in compound miter saw with broad back surface down flat on saw table (visible decorative surface up). choosing the correct miter angle is crucial for achieving straight cuts on crown molding. Make the first cut on one piece of molding. Once again, this adjustment will have a special marking on most saws. Set the bevel to 33.9 degrees. if you’re cutting templates for crown molding with 45 degree spring angles, substitute these angles on your miter saw. Lay the crown flat and cut. place the crown molding upside down on the miter saw table, holding it at the same angle as you plan to install it. Set the miter angle to 31.6 degrees. On most saws, “31.6” is specially marked. installing crown molding in your home or on a project? learning how to cut crown molding is one of the most important aspects of finish carpentry, and it’s easy to become. a few degrees can make a big difference when you're setting the angle on your miter saw for crown molding. Now there’s no need to precariously hold crown at an angle right next to an incredibly dangerous saw.
from www.sbebuilders.com
Once again, this adjustment will have a special marking on most saws. installing crown molding in your home or on a project? On most saws, “31.6” is specially marked. Set the miter angle to 31.6 degrees. place the crown molding upside down on the miter saw table, holding it at the same angle as you plan to install it. The miter angle refers to the angle at which the saw blade tilts to. Now there’s no need to precariously hold crown at an angle right next to an incredibly dangerous saw. place molding in compound miter saw with broad back surface down flat on saw table (visible decorative surface up). Set the bevel to 33.9 degrees. if you’re cutting templates for crown molding with 45 degree spring angles, substitute these angles on your miter saw.
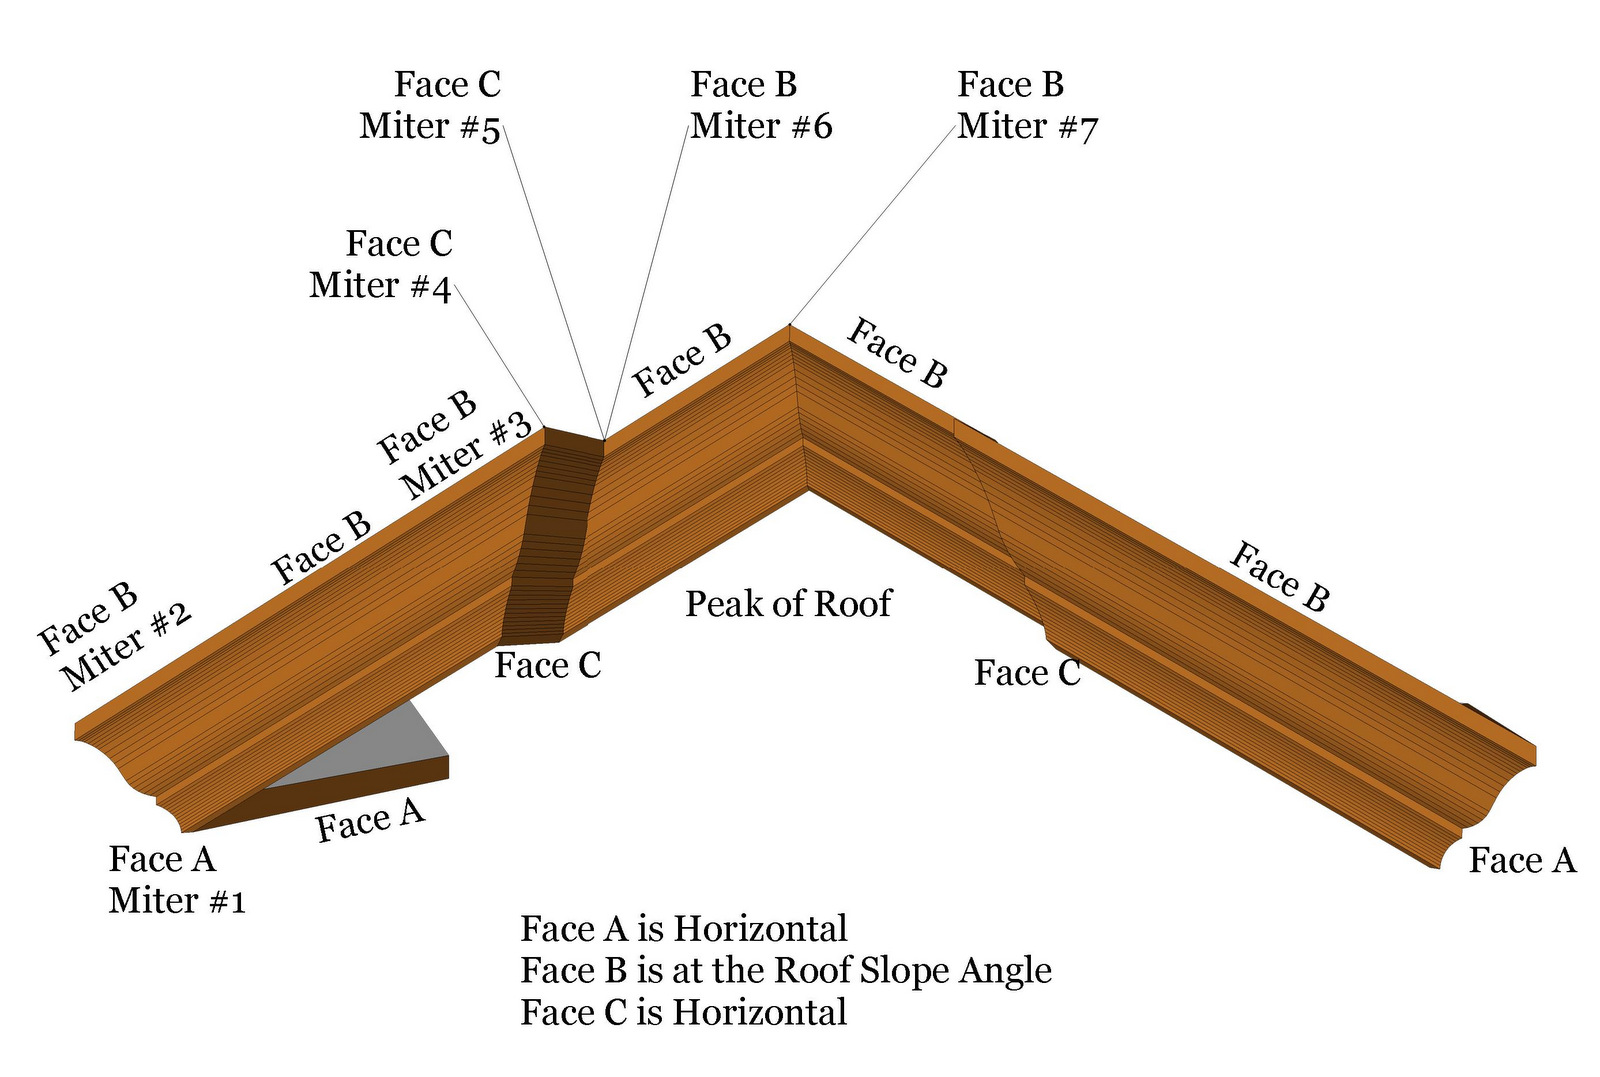
Rake Crown Moulding Miter Angles
Miter Saw Angles For Crown Molding With this cutting technique, you use a simple jig and the built. learning how to cut crown molding is one of the most important aspects of finish carpentry, and it’s easy to become. choosing the correct miter angle is crucial for achieving straight cuts on crown molding. if you’re cutting templates for crown molding with 45 degree spring angles, substitute these angles on your miter saw. Once again, this adjustment will have a special marking on most saws. a few degrees can make a big difference when you're setting the angle on your miter saw for crown molding. Lay the crown flat and cut. On most saws, “31.6” is specially marked. installing crown molding in your home or on a project? place the crown molding upside down on the miter saw table, holding it at the same angle as you plan to install it. Set the miter angle to 31.6 degrees. Now there’s no need to precariously hold crown at an angle right next to an incredibly dangerous saw. The miter angle refers to the angle at which the saw blade tilts to. With this cutting technique, you use a simple jig and the built. Set the bevel to 33.9 degrees. Make the first cut on one piece of molding.